Getting your PC fans in the right position can drop temperatures by 10–15°C — without spending a single rupee on new hardware. This guide covers the optimal fan setup for PC most builders skip, why it matters more than fan speed, and exactly where to place each fan for the best airflow. Fan placement is also one of the most impactful steps in any gaming PC maintenance routine.
Why Fan Placement Beats Fan Speed
More fans do not always mean cooler temperatures. A PC with six fans placed badly will run hotter than one with three fans placed correctly.
The reason is simple: airflow needs a direction. Hot air has to move from inside the case to outside in one clean path. When fans conflict with each other, air circulates in loops instead of escaping. Your components cook themselves quietly while your fans spin at full speed.
Getting the fan placement right for optimal air circulation in your PC is the single most effective free upgrade you can make.
The Golden Rule: Positive vs Negative Pressure
Before placing a single fan, you need to decide on a pressure strategy.
Positive pressure means more intake fans than exhaust fans. Air is pushed in faster than it can escape, so it exits through every gap and vent in your case. This reduces dust buildup inside the case.
Negative pressure means more exhaust fans than intake fans. Air is pulled out faster than it enters, so fresh air gets sucked in through every gap. Temperatures are often slightly lower, but dust accumulates faster.
Balanced pressure means equal intake and exhaust. This is the safest starting point for most builds and works well in the majority of cases.
Most builders recommend a slight positive pressure setup. It keeps dust out of areas that are hard to clean, like your motherboard and GPU, while still maintaining strong airflow. If dust has already built up inside your system, read this guide on how to clean dust from your gaming PC before setting your fans up.
The Optimal PC Fan Setup: Position by Position
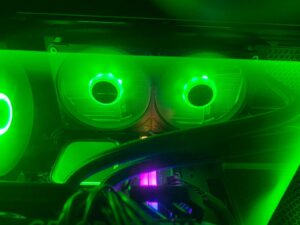
Front Fans (Intake)

The front of your case is where cool air enters. This is the most important intake position in any build.
Place two or three fans at the front facing inward. These fans draw cool air across your GPU and toward your CPU cooler. Larger fans (140mm) move more air at lower noise levels compared to smaller ones (120mm), so use the largest size your case supports.
If your case has a mesh front panel, you are already in good shape. Solid front panels choke airflow significantly and are worth considering when buying a new case.
Top Fans (Exhaust)
Hot air rises naturally. The top of your case should almost always be exhaust.
Place one or two fans at the top facing outward. This vents the hottest air in your system, the air that has already passed over your CPU and VRMs. If you have an AIO liquid cooler, this is typically where its radiator sits, pulling hot coolant air out of the case directly.
One common mistake is putting top fans as intake. This works against natural convection and forces your other fans to fight the rising hot air. Avoid it unless you have a very specific reason.
Rear Fan (Exhaust)
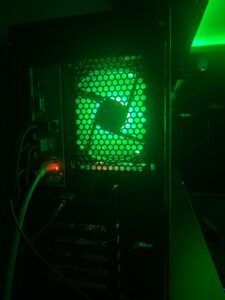
The rear fan position is almost universally exhaust in every build. Place one fan here facing outward.
This fan sits right behind your CPU cooler and pulls air straight out after it has passed through the heatsink. It works in perfect coordination with your front intake fans, completing the front to rear airflow path.
Bottom Fans (Intake)
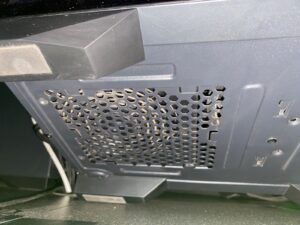
Not every case supports bottom fans, but if yours does, this is a great position for intake.
Bottom fans pull cool air from the floor directly up toward your GPU, which is often the hottest component in a gaming PC. Use a filter here since bottom intake fans collect dust faster than any other position.
Side Fans
Side panels are less common now that tempered glass panels have taken over, but some cases still offer side vents.
If available, side fans work best as intake aimed directly at your GPU. This is especially useful in builds where the GPU is working very hard and the front fans cannot deliver enough cool air on their own.
Fan Placement for Optimal Air Circulation: Step by Step
Here is the exact setup to follow for most mid tower cases:
- Front: 2 to 3 fans set as intake
- Rear: 1 fan set as exhaust
- Top: 1 to 2 fans set as exhaust
- Bottom: 1 fan set as intake (if supported)
This creates a clean airflow path: cool air enters from the front and bottom, sweeps across the GPU and CPU, and hot air exits from the rear and top.
After setting this up, check your temperatures under load. If your GPU is still running hot, add a fan directly in front of it. If your CPU is struggling, make sure nothing is blocking the rear exhaust fan. Persistent CPU heat after fixing airflow is usually a sign of a deeper issue — this breakdown of why your CPU is overheating will help you diagnose it.
Cable Management and Its Effect on Airflow
No fan setup can overcome a case full of loose cables.
Cables act like walls inside your PC. They block airflow between the front fans and your components. Even a modest improvement in cable routing, tucking cables behind the motherboard tray or using velcro ties, can drop temperatures by 3 to 5°C.
If you have done everything right with your fans and temperatures are still higher than expected, check your cable situation before buying more hardware. It is also worth reading whether cleaning your PC actually improves performance — the answer might surprise you.
Fan Curve Settings: Getting More from Your Setup
Once your fans are physically in the right place, software settings matter.
Most modern motherboards let you set custom fan curves in the BIOS. A fan curve tells each fan how fast to spin based on temperature.
A good starting fan curve for most builds:
- Below 40°C: 30 to 40% speed (near silent)
- 40 to 60°C: 50 to 70% speed (quiet and effective)
- Above 70°C: 100% speed (full cooling when needed)
This keeps your PC quiet during light use and ramps up cooling exactly when it is needed during gaming or heavy workloads. Letting temperatures climb above 90°C consistently can cause thermal throttling, which directly tanks your in-game performance — here is more on how thermal throttling causes game stuttering.
Common Mistakes to Avoid
Mixing fan directions by accident. Always check the arrow on the side of the fan before mounting. One arrow shows airflow direction, the other shows blade rotation. Getting this wrong once can make an entire fan row intake when it should be exhaust.
Blocking front fans with HDD cages. If your case has a large drive cage blocking the front fans, consider removing it if you are running only SSDs. The airflow improvement is significant.
Ignoring the radiator position. If you use an AIO cooler, the radiator position matters as much as your case fans. Front mounted radiators work as intake and cool the liquid before air warms the rest of the case. Top mounted radiators work as exhaust and vent hot coolant air directly out. Both work, but they change how you should set up your remaining fans.
Using mismatched fan sizes. Mixing 120mm and 140mm fans is fine, but avoid mixing fans with very different static pressure ratings in the same row. Uneven pressure distribution reduces the effectiveness of the whole group.
Quick Reference: Optimal Fan Setup For PC Summary
| Position | Direction | Priority |
|---|---|---|
| Front | Intake | High |
| Rear | Exhaust | High |
| Top | Exhaust | Medium |
| Bottom | Intake | Low |
| Side | Intake | Optional |
Final Thoughts
The optimal fan setup for your PC is not about having the most fans. It is about creating a clear, unobstructed path for air to enter cool and exit hot.
Start with the front to rear airflow path, add top exhaust fans, manage your cables, and set a smart fan curve. Most builds see significant temperature drops from these changes alone, no new hardware required.
If your temperatures are still high after following this guide, the next step is to look at your thermal paste and heatsink contact, not more fans. This step by step CPU cleaning guide covers reseating and repasting in detail. For a broader look at squeezing more out of your system, check out our full guide on how to optimize your computer for best performance.
I spent 2 years managing a gaming café where I maintained a full setup — multiple gaming PCs, PS5 consoles, and racing simulators running back to back every day. I hold a Diploma in Computer Applications and started FixMyGames.in to document the real fixes I learned on the job — not the generic advice you find everywhere else.